How to Setup Vendor API Documentation on Postman
Here are the steps on how you set up the Vendor API Documentation on Postman
- Open the Vendor API Documentation link https://documenter.getpostman.com/view/27128735/2s93eU2ZKm
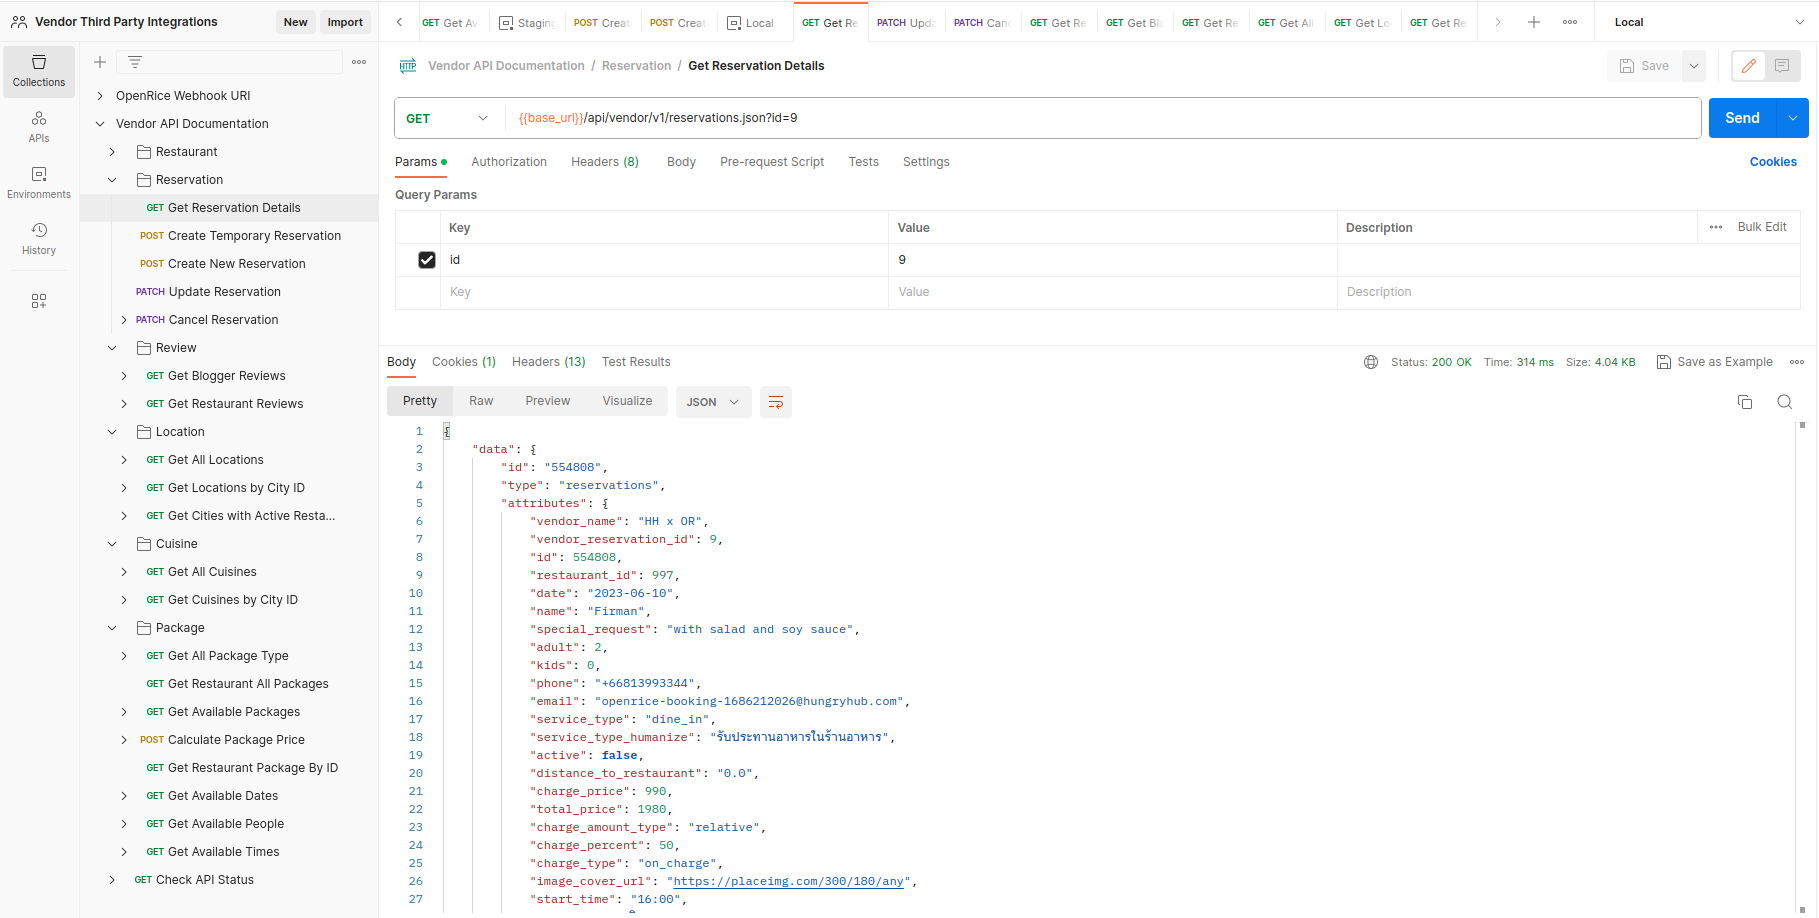
- You can see the Documentation about Vendor APIs and detailed endpoints
- Click Run in Postman in the top right side

- If you don't have Postman apps installed on your computer, you can download it from here https://www.postman.com/downloads/ and choose the operating system that matches you.
But if you don't want to download the apps, you can use the Postman web and import the collections to your Workspace (But we preferred to use Postman desktop)
- If you have finished importing the collections now we can configure the environment, there are two types of endpoints it's for local and staging
Setting environment for staging
For staging, you need to set up the environment like this
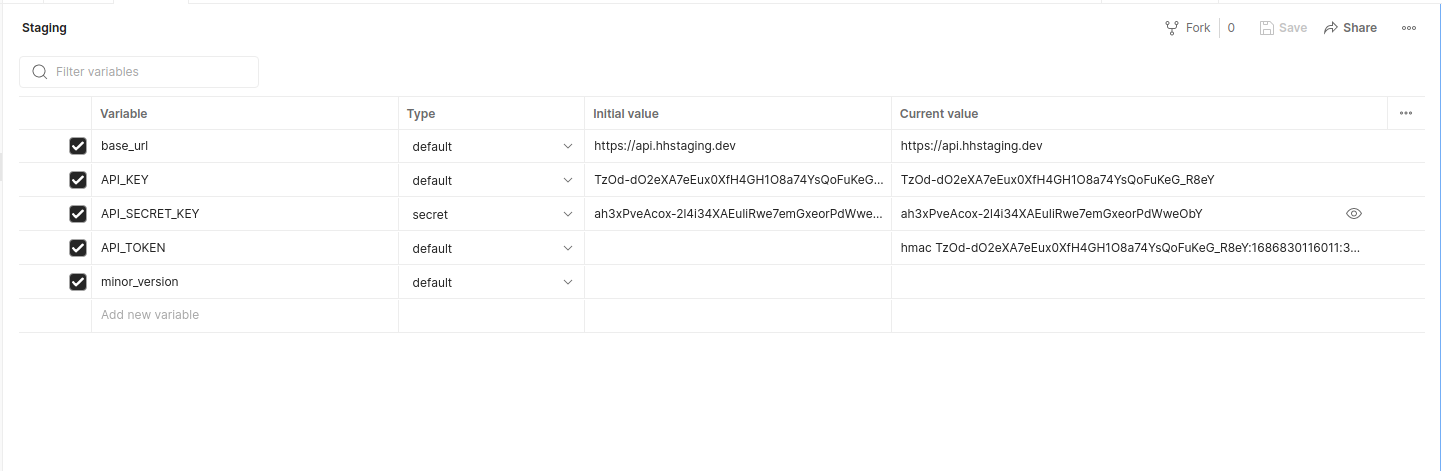 You can get the API_KEY and API_SECRET_KEY from https://hhstaging.dev/oauth/applications and click on the app that you want to use, for example, I want to test for OpenRice then I click HH x OR apps
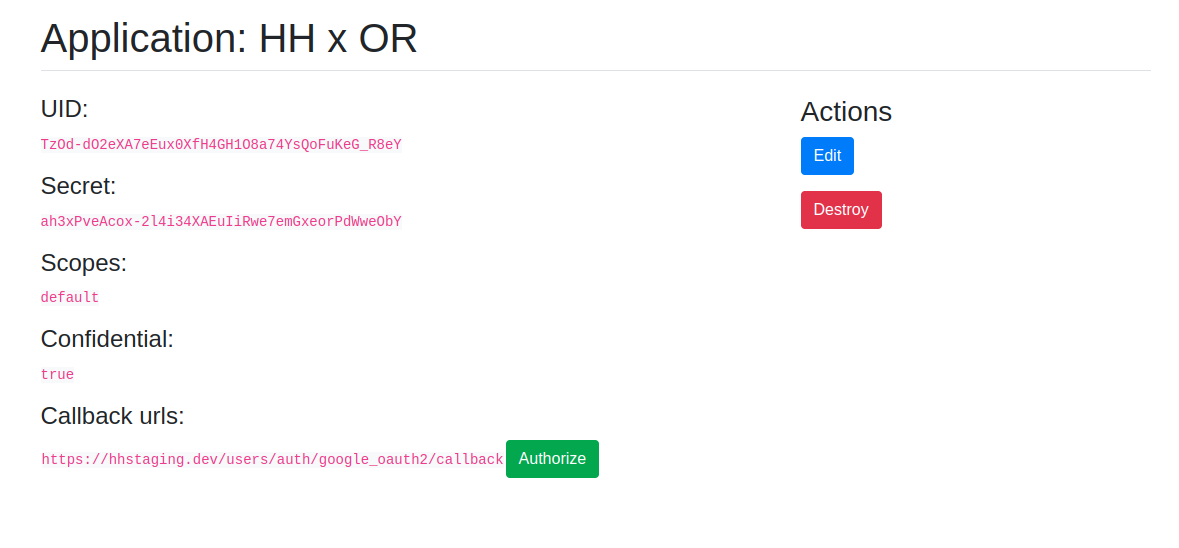
You can use UID as API_KEY and Secret as API_SECRET_KEY , minor_version = 3 and you can let the API_TOKEN empty because it's used for debugging purposes. You can see the token generated by pre-scripts on this API_TOKEN env.
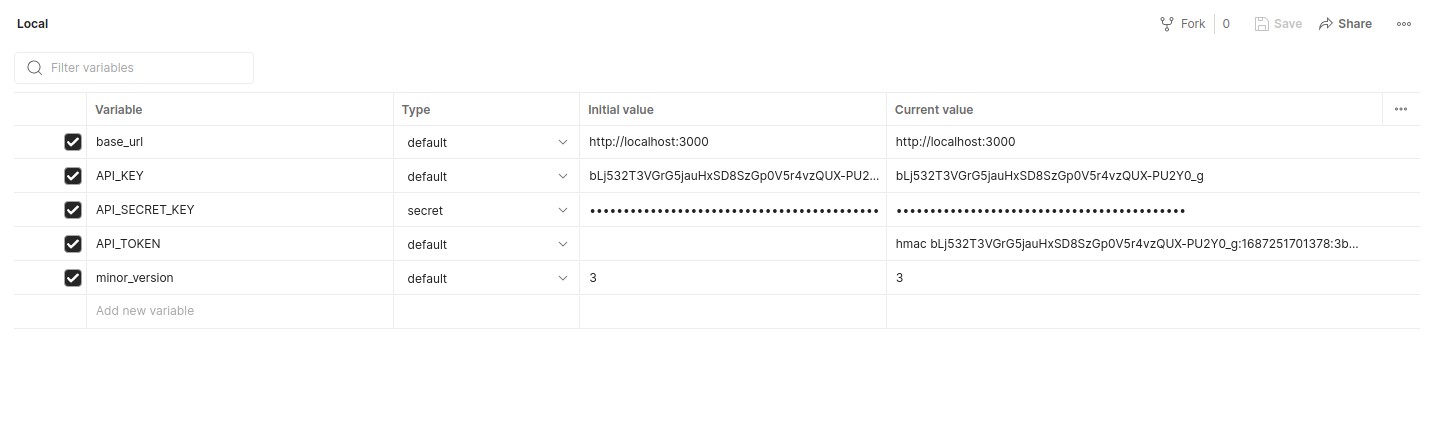
Setting environment for local
For local, you need to configure these environment variables (the keys are same with staging)
First, you need to run the hh-server project on your local machine
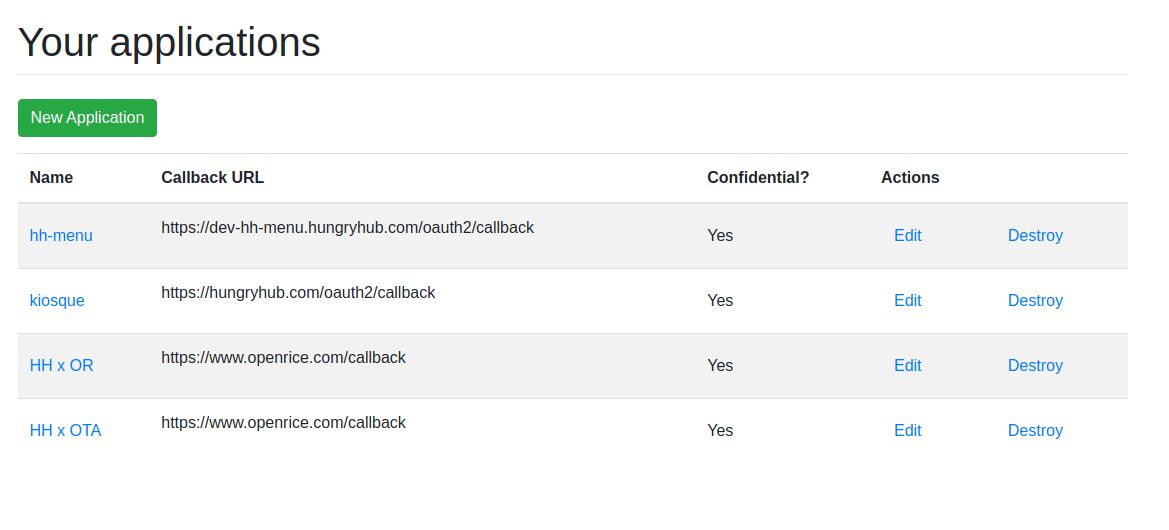
Then you need to create the applications on http://localhost:3000/oauth/applications and if the vendor is not on there you need to create that first by clicking the New Application button
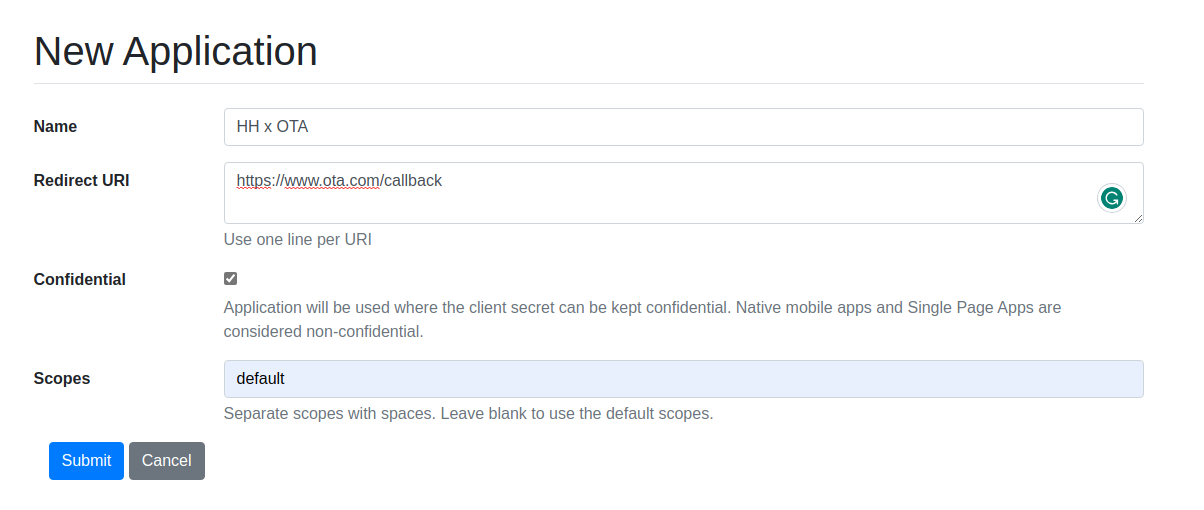
Fill out the form, for now, we only use the Name field so you can fill in the other fields with dummy values. For example, in the below picture, I want to create a new vendor with a name HH x OTA then click Submit
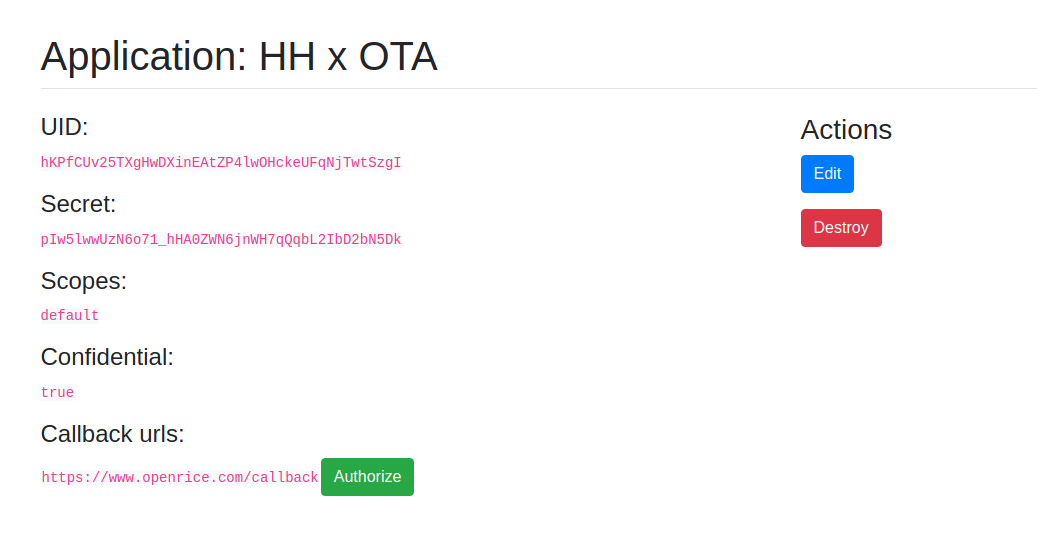
After the vendor is created you can use the UID as API_KEY and Secret as API_SECRET_KEY , minor_version = 3
- Now you can try all of the endpoints and start testing
Note:
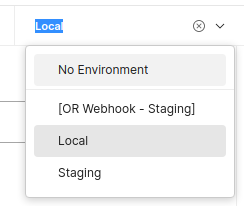
Make sure you have chosen the env on the top right section
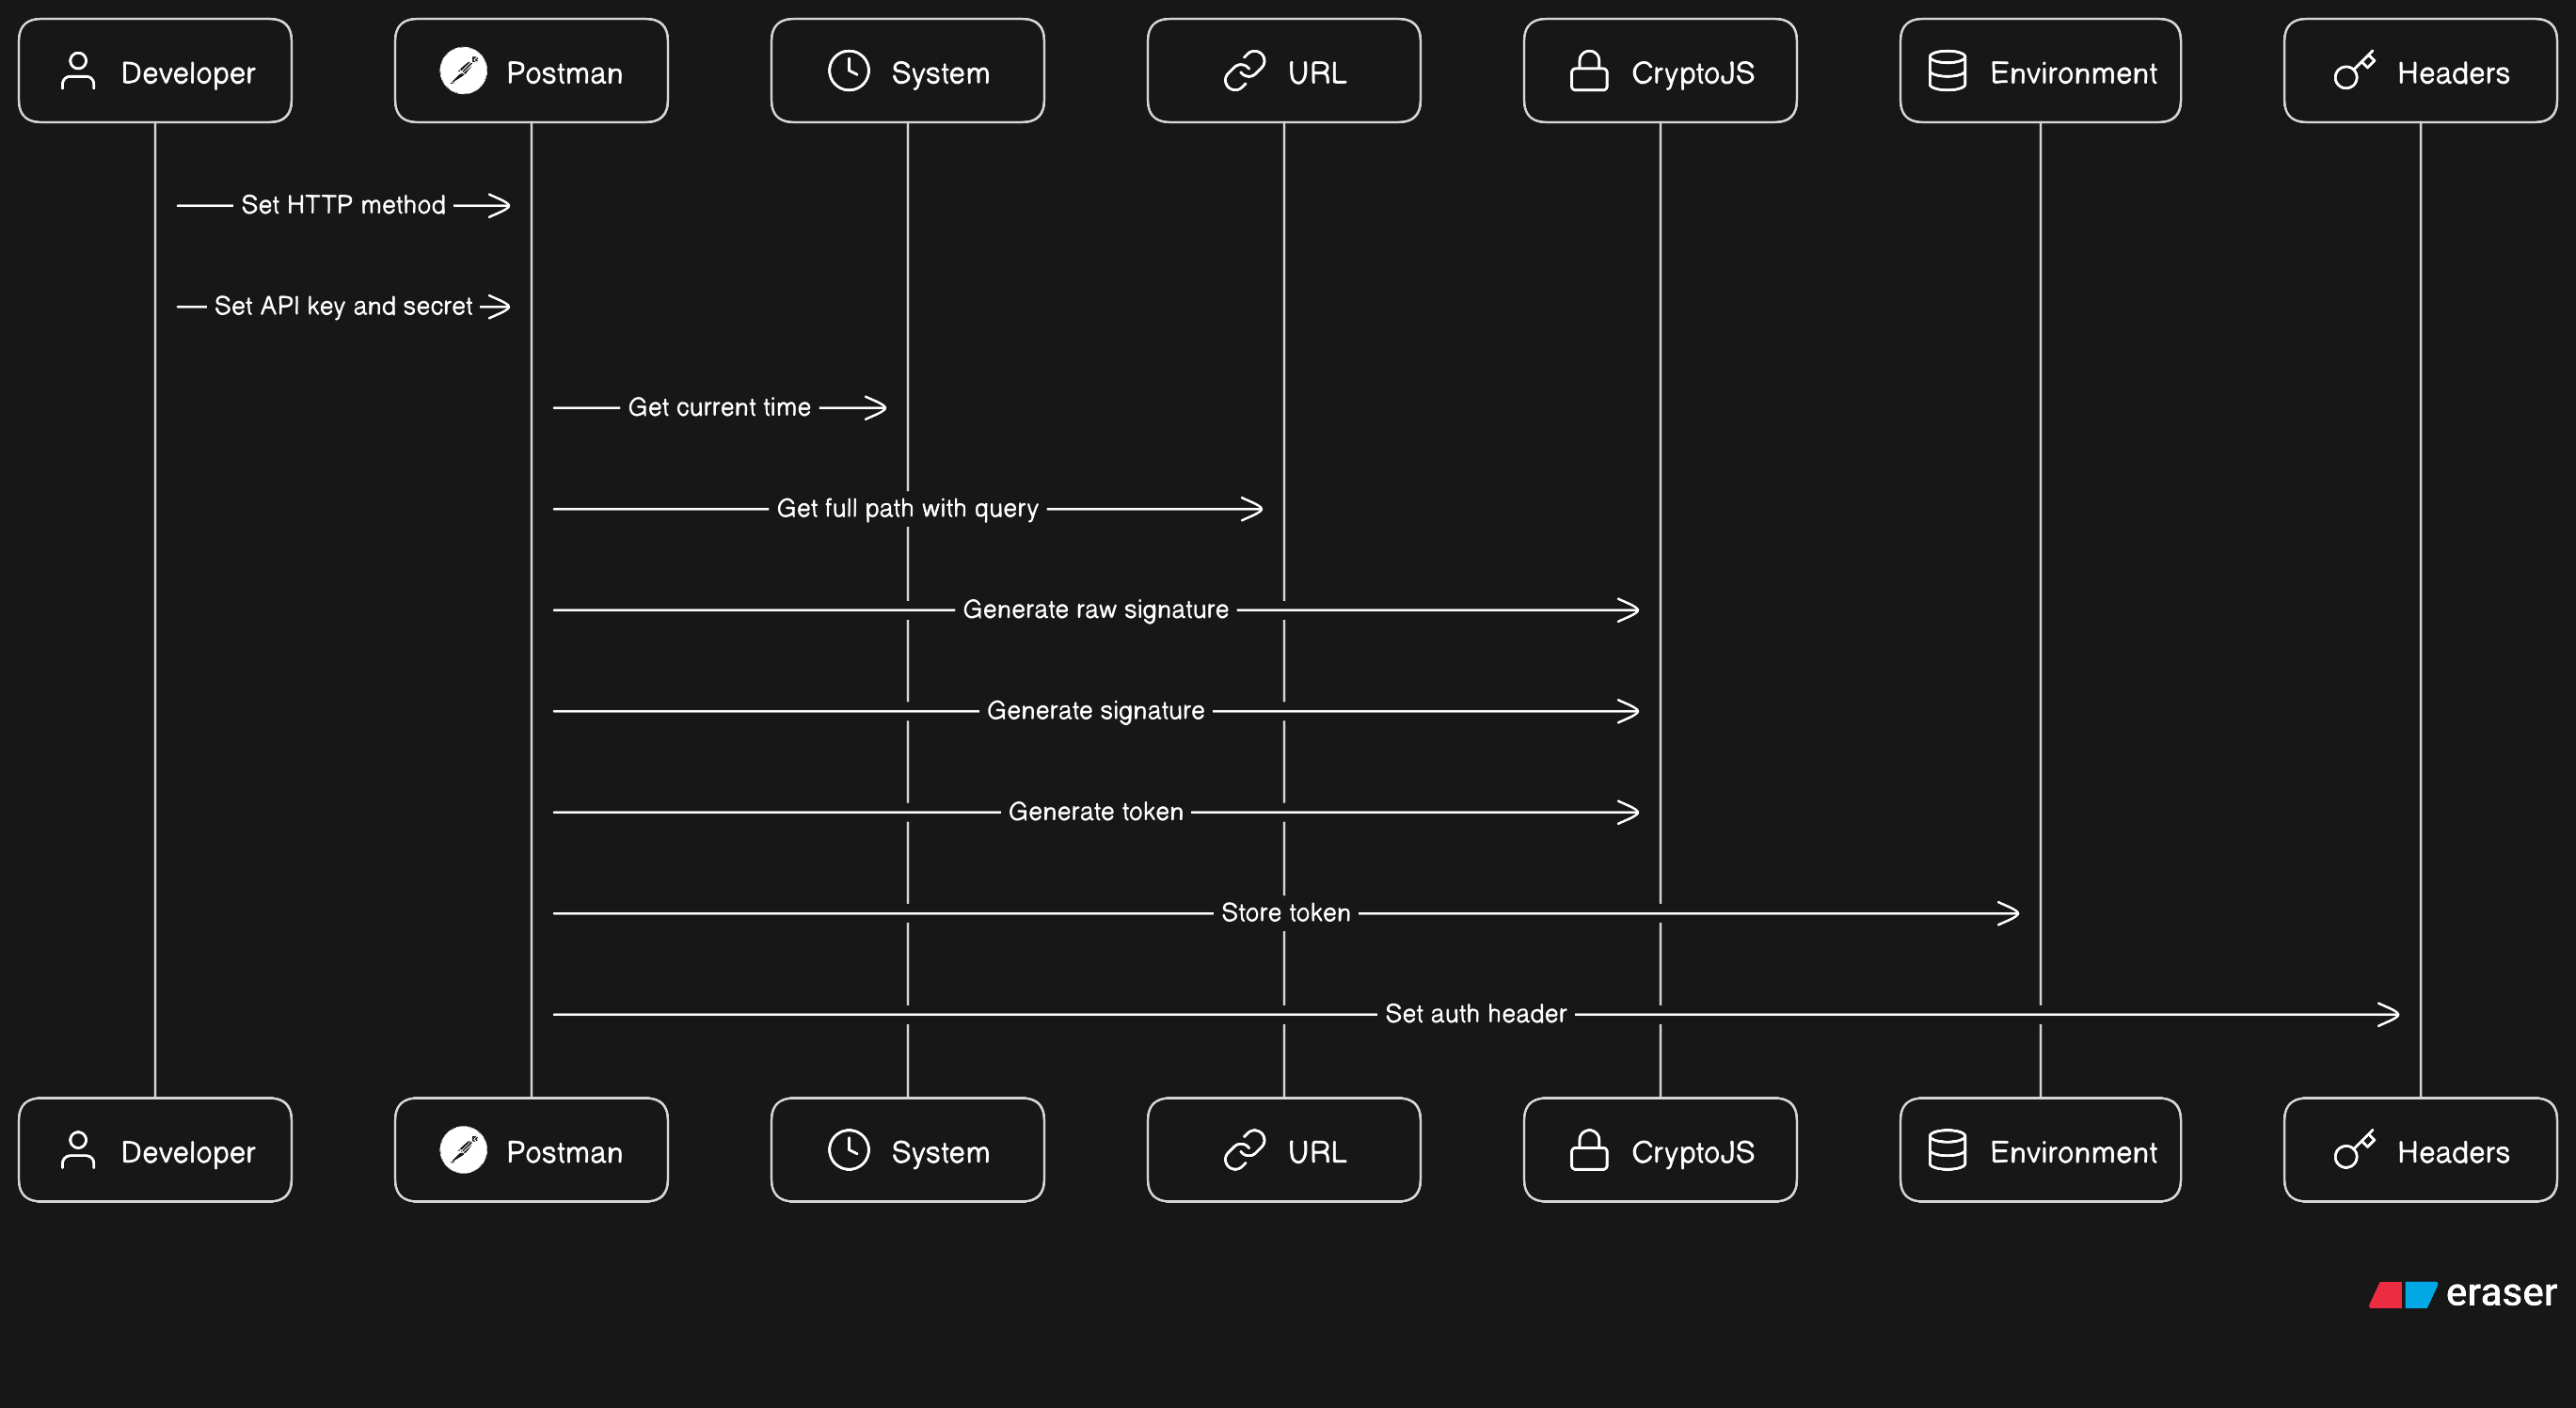
Pre-request Script for Generated the Signature and Tokens
If you try to check on the Vendor API Documentation collection, you will find the Pre-request Script written in Javascript. The purpose of this Pre-request Script is to generate the Signature that is used on this Token and send in request header for every request endpoint.
TOKEN = hmac
: :
Here is the script and flow diagram how the Pre-request script work
Code:
// get http method
const httpMethod = pm.request.method;

// get api key and secret from environment
const apiKey = pm.environment.get('API_KEY');
const apiSecretKey = pm.environment.get('API_SECRET_KEY');

// generate time and get full path from url
const currentTime = new Date().getTime().toString();
const path = pm.variables.replaceIn(pm.request.url.getPathWithQuery());
let body, rawSignature;

// check and generate raw signature
if (httpMethod === 'GET') {
    rawSignature = `${currentTime}\r\n${httpMethod}\r\n${path}\r\n\r\n`;
} else {
    body = pm.request.body.raw;
    rawSignature = `${currentTime}\r\n${httpMethod}\r\n${path}\r\n\r\n${body}`;
}

// generate signature
const signature = CryptoJS.HmacSHA256(rawSignature, apiSecretKey).toString();

// generate token
const token = `hmac ${apiKey}:${currentTime}:${signature}`;

// store token to environment and set auth header
pm.environment.set('API_TOKEN', token)
pm.request.headers.add({
  key: "Authorization",
  value: token
});
Flow: