How to use Codespaces and Dev Containers
Create a Codespace
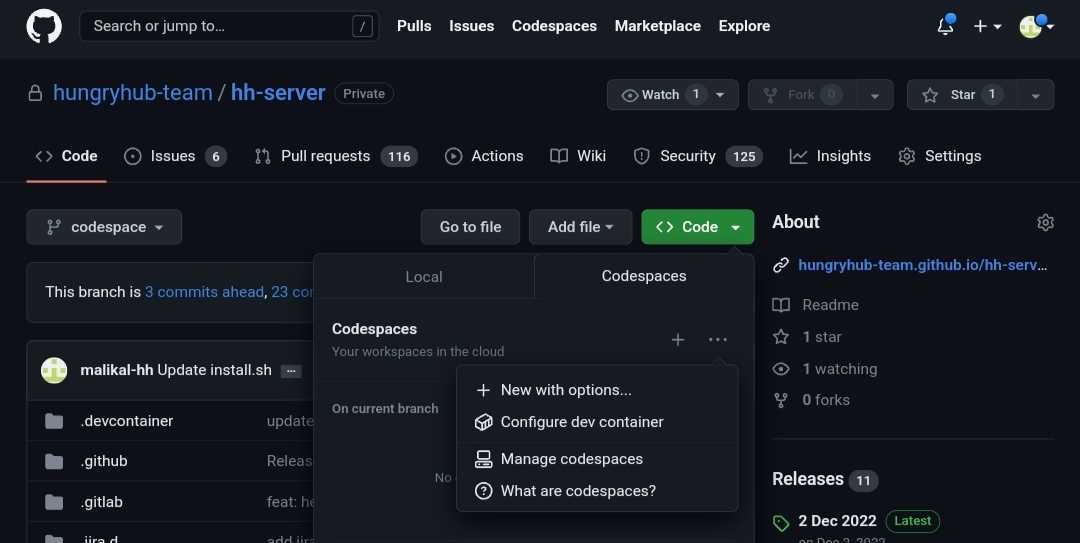
- Open the
codespacebranch. - Click Code, then click New with options.
- Do not use the
developbranch because it is protected.
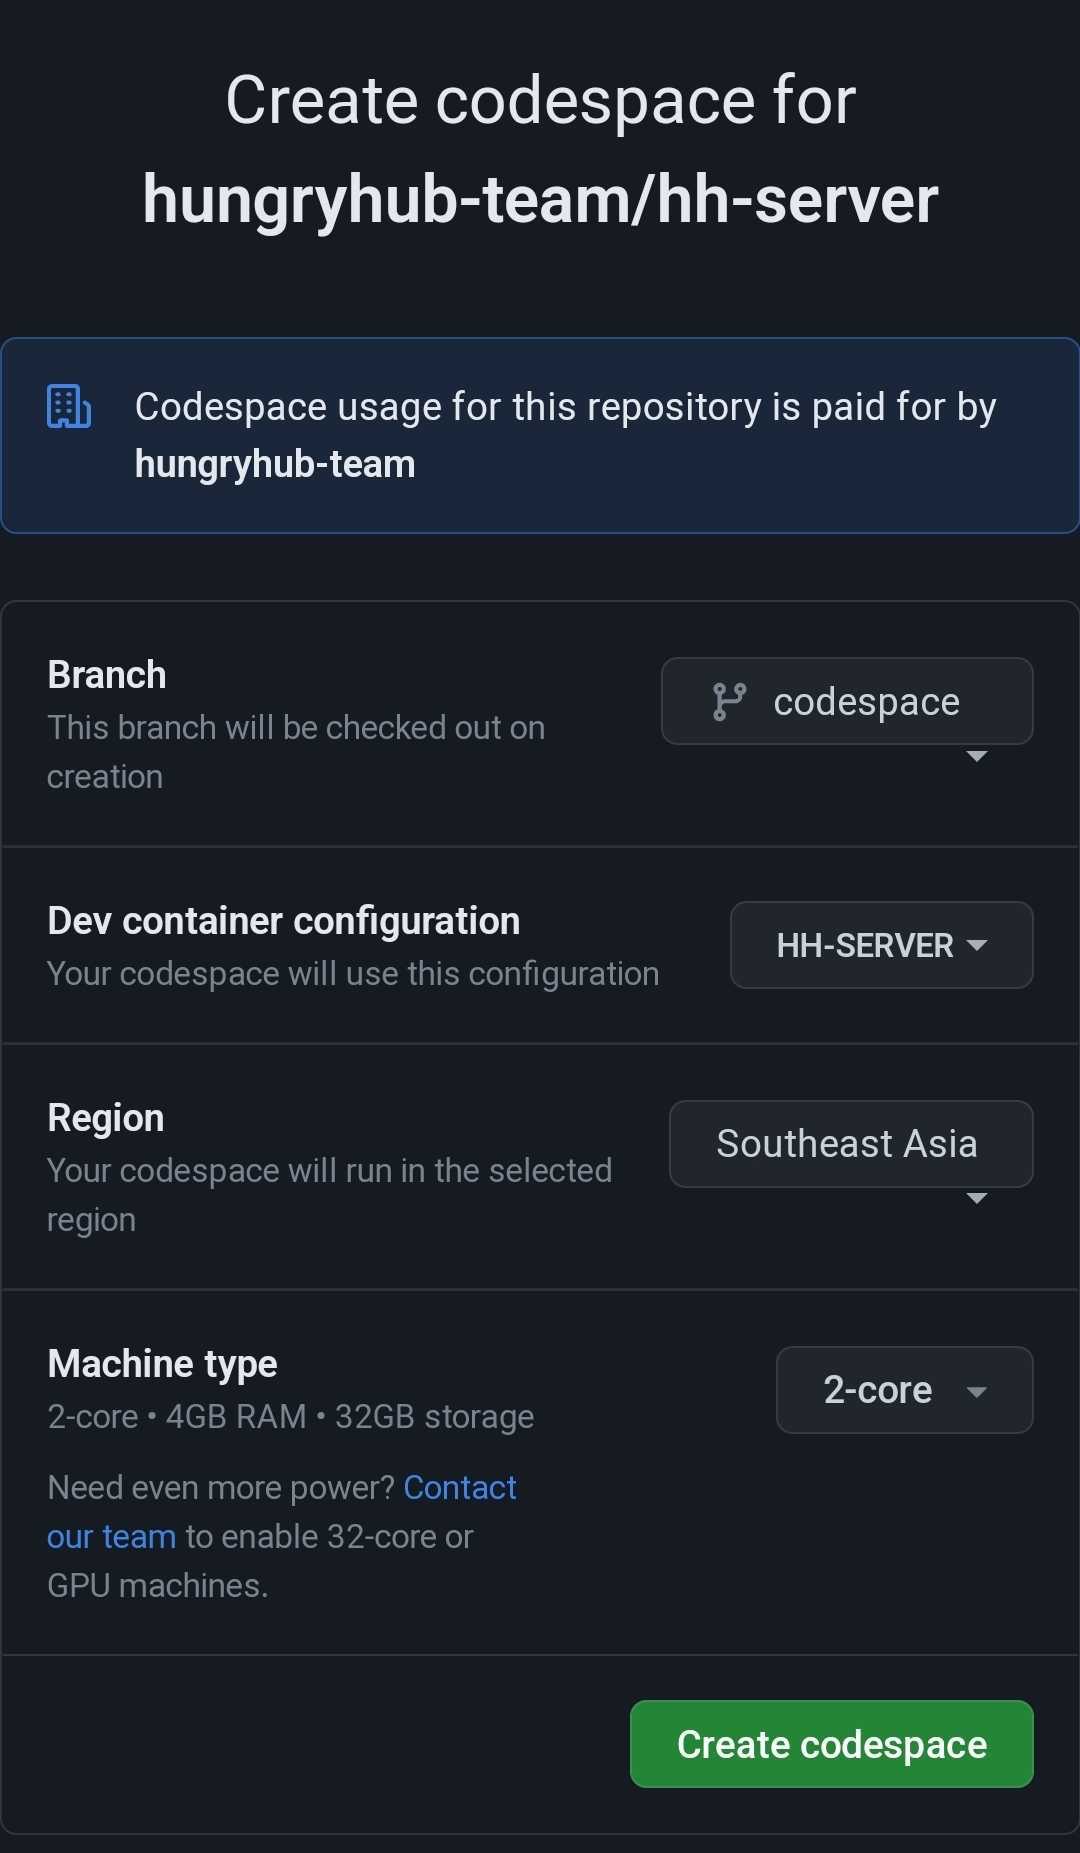
- Click Create codespace.
- Make sure the Dev Container configuration is set to
HH-SERVER. - Wait for the Codespace to finish provisioning.
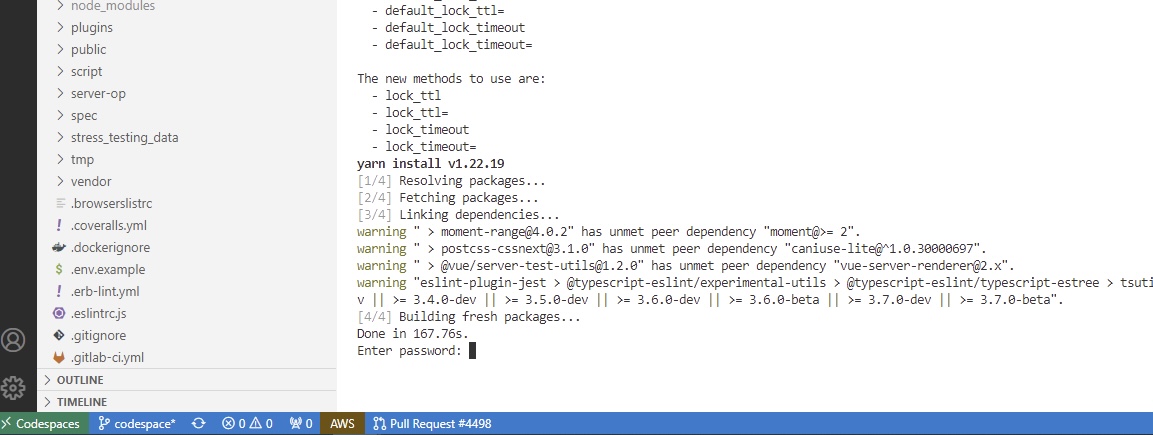
Verify local services
After the Codespace is ready, it may ask for the MySQL password to confirm that the MySQL container started correctly. The MySQL password is stored in the shared credentials document managed by the DevOps team — request it from DevOps or retrieve it from the approved secret store.
Check whether the container is running:
docker ps
If the MySQL container did not start, run:
./install.sh
This script should start:
- MySQL on port
3306 - Redis on port
6379 - Memcached on port
11211
Restore the database
Upload the dump file to the Codespace, then restore it:
- Copy the dump file into the Codespace using the terminal:
# From your local machine
gh codespace cp ./dump.sql remote:/workspaces/<repo-name>/dump.sql
Or upload it via the VS Code Codespace file explorer (drag and drop into the file panel).
- Restore the database:
mysql -h 127.0.0.1 -u root -p <database_name> < dump.sql
Switch branches if needed
You can switch to another branch with:
git checkout <branch_name>
Run the application
Start the required services:
bundle exec rails s puma
bundle exec sidekiq
./bin/webpack-dev-server