How To Migrate Database From RDS To DigitalOcean
How To Migrate Database From RDS Snapshot To DigitalOcean Managed Database
Step 1: Restore RDS Snapshot
- Go to AWS RDS Console
- Click on Snapshots
- Select the snapshot you want to restore
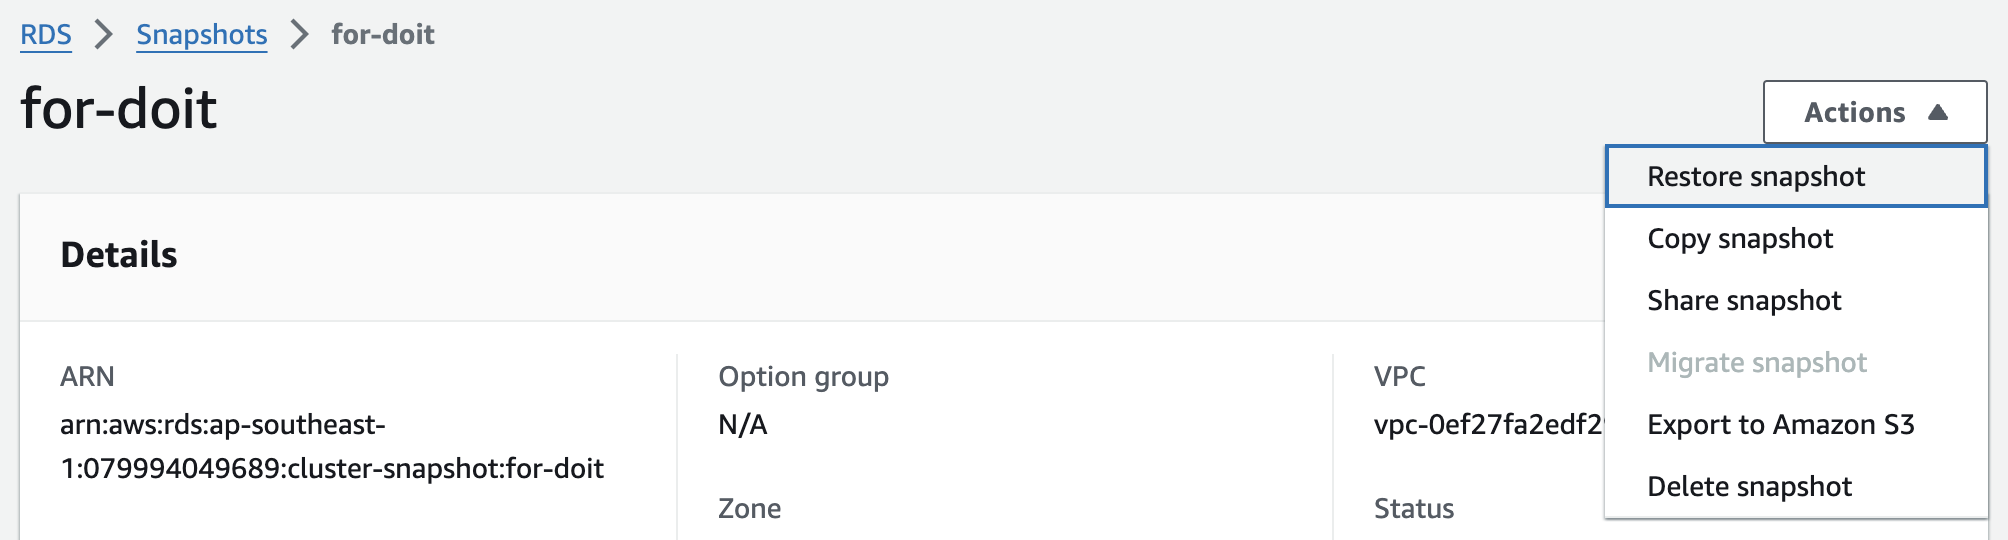
- Click on Actions > Restore Snapshot
- Fill in the details Important fields:
- Make it publicly accessible: Yes (if you want to access the database from outside the VPC)
- DB Instance Class: db.r5.large
- Multi-AZ Deployment: No
- Click on Restore DB Instance
- Wait for the process to complete
- Once the process is complete, you will see the new DB instance in the list of DB instances
- Update the master password of the DB instance
Step 2: Create EC2 Instance To Dump Data
- Go to AWS EC2 Console
- Launch a new EC2 instance
- Choose an Ubuntu AMI
- Choose the same VPC as the RDS instance
- Choose an instance type with enough resources to dump the data
- Add a new security group with inbound rules to allow SSH
- Connect to the EC2 instance using SSH
Step 3: Connect EC2 Instance To RDS Instance
- Go to the RDS Cluster
- Click Set up EC2 Connection
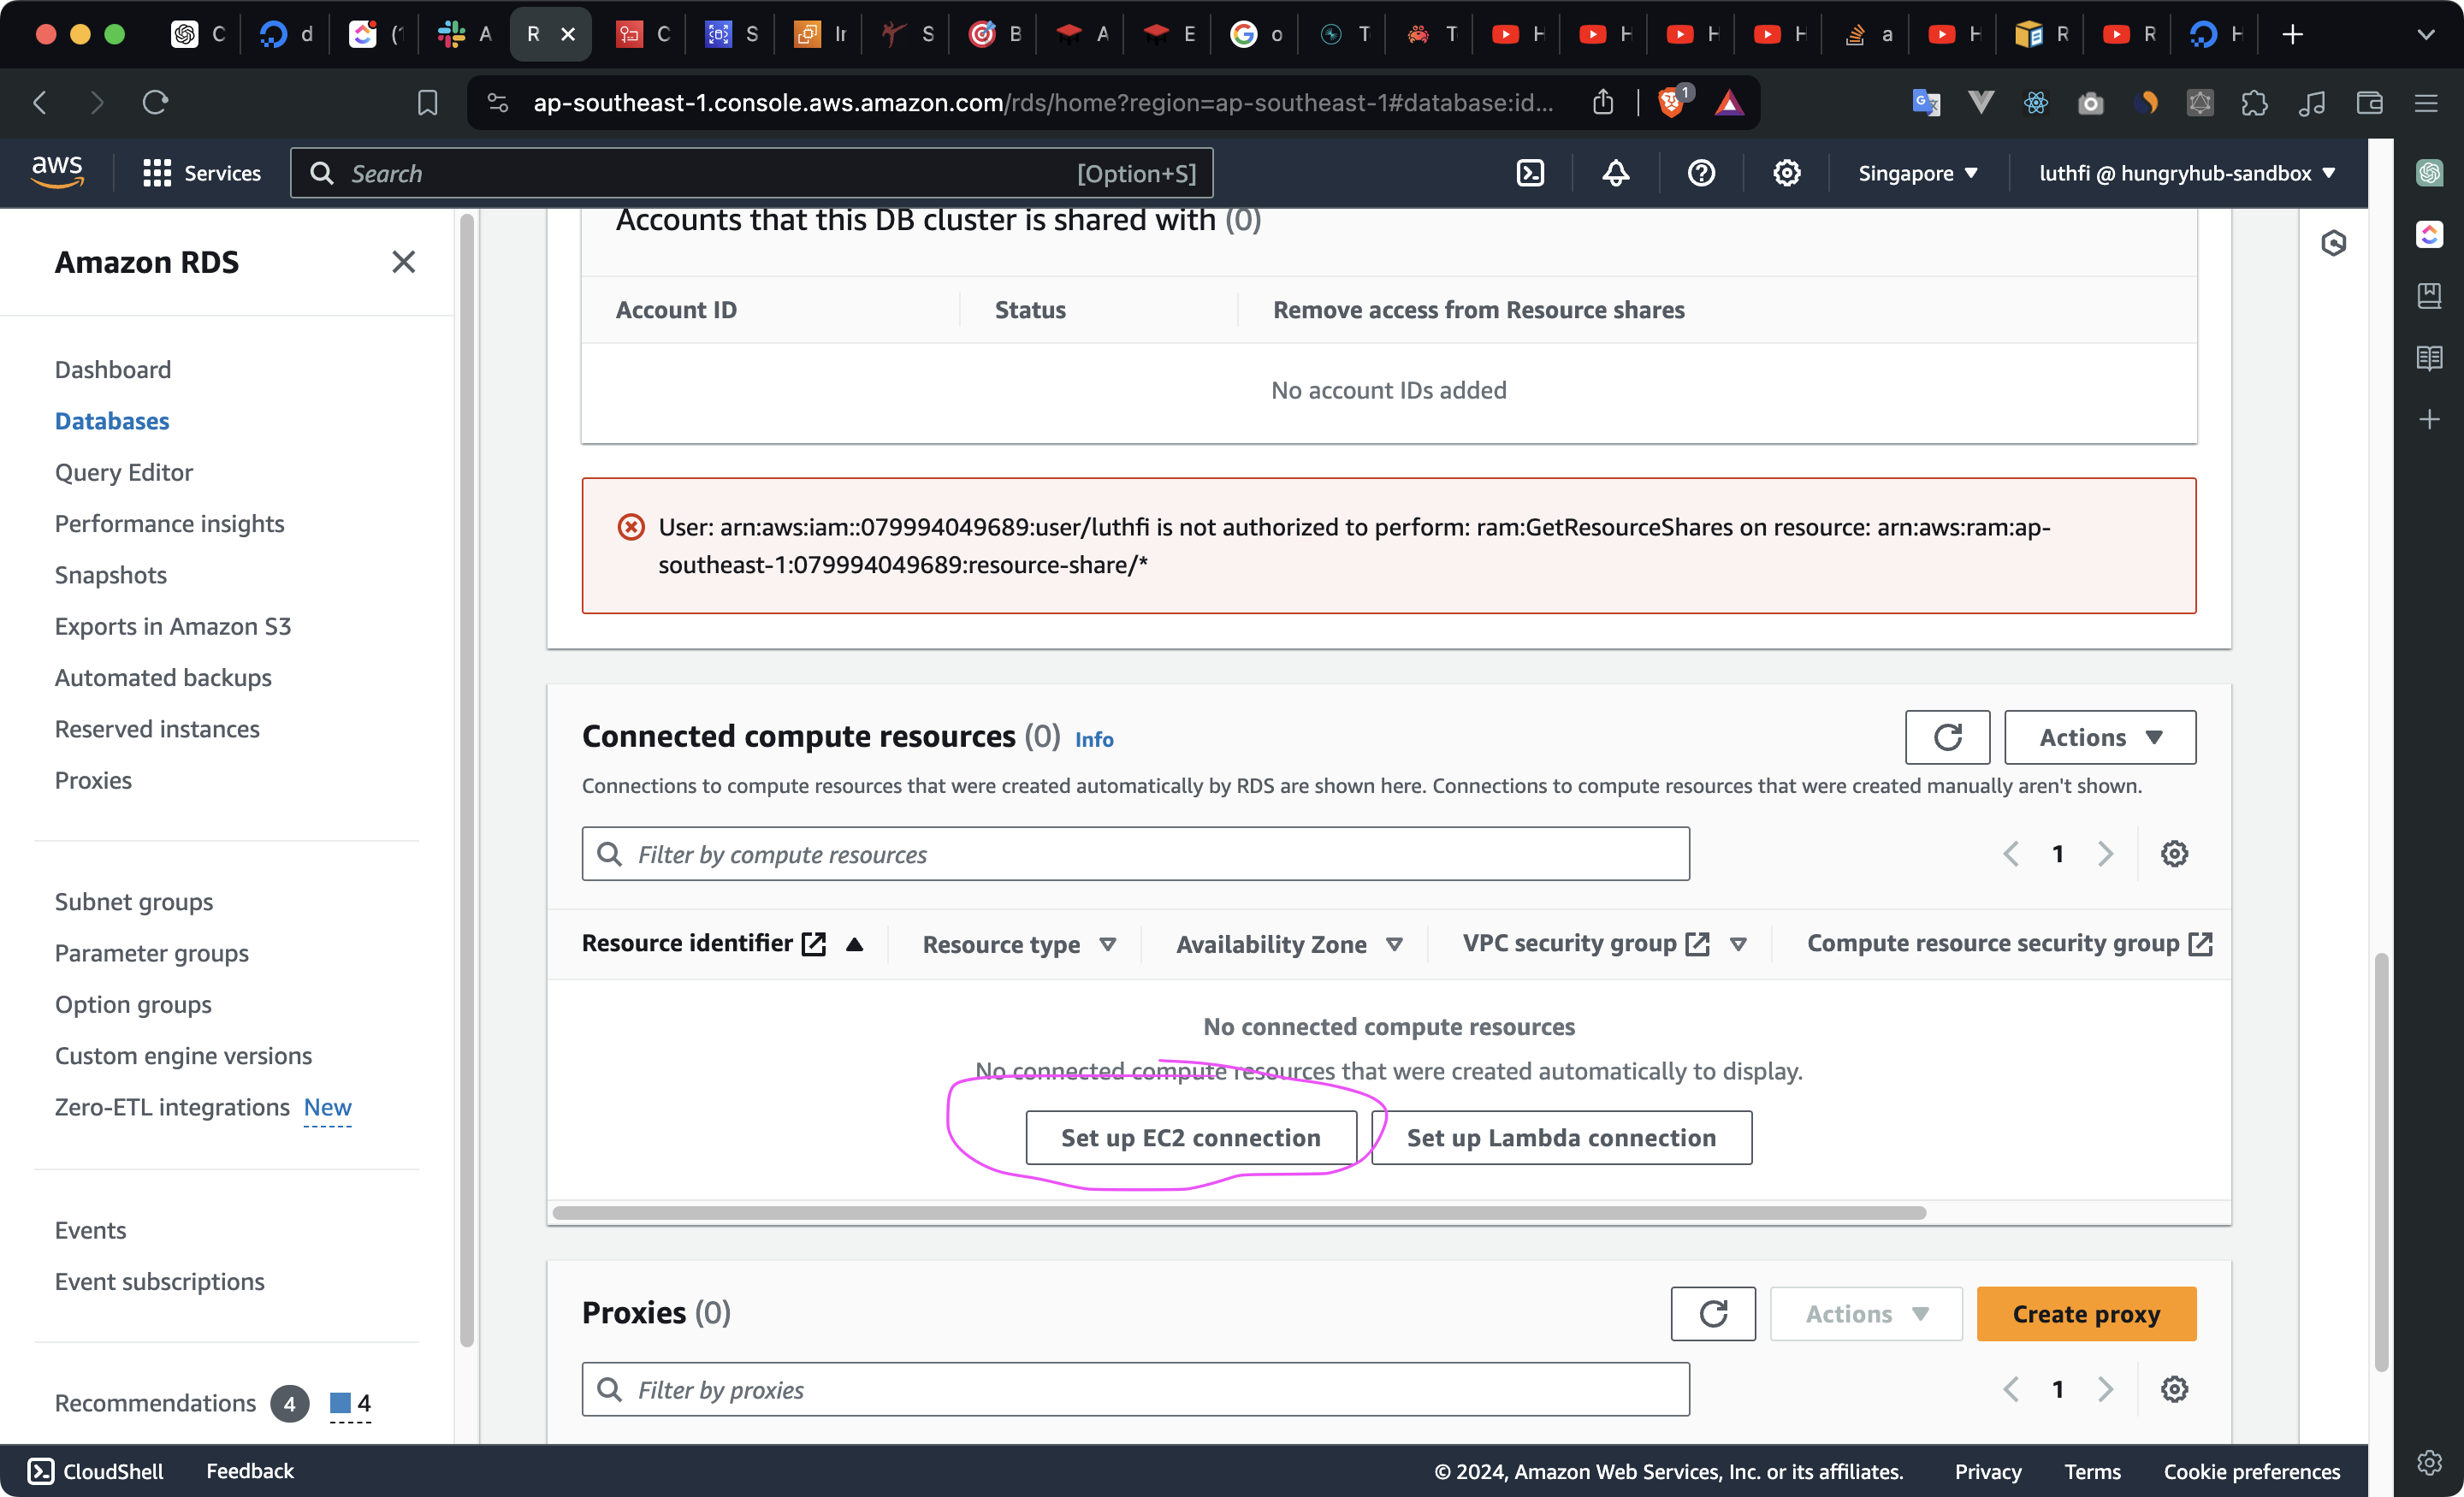
- Choose the EC2 instance you created in the previous step
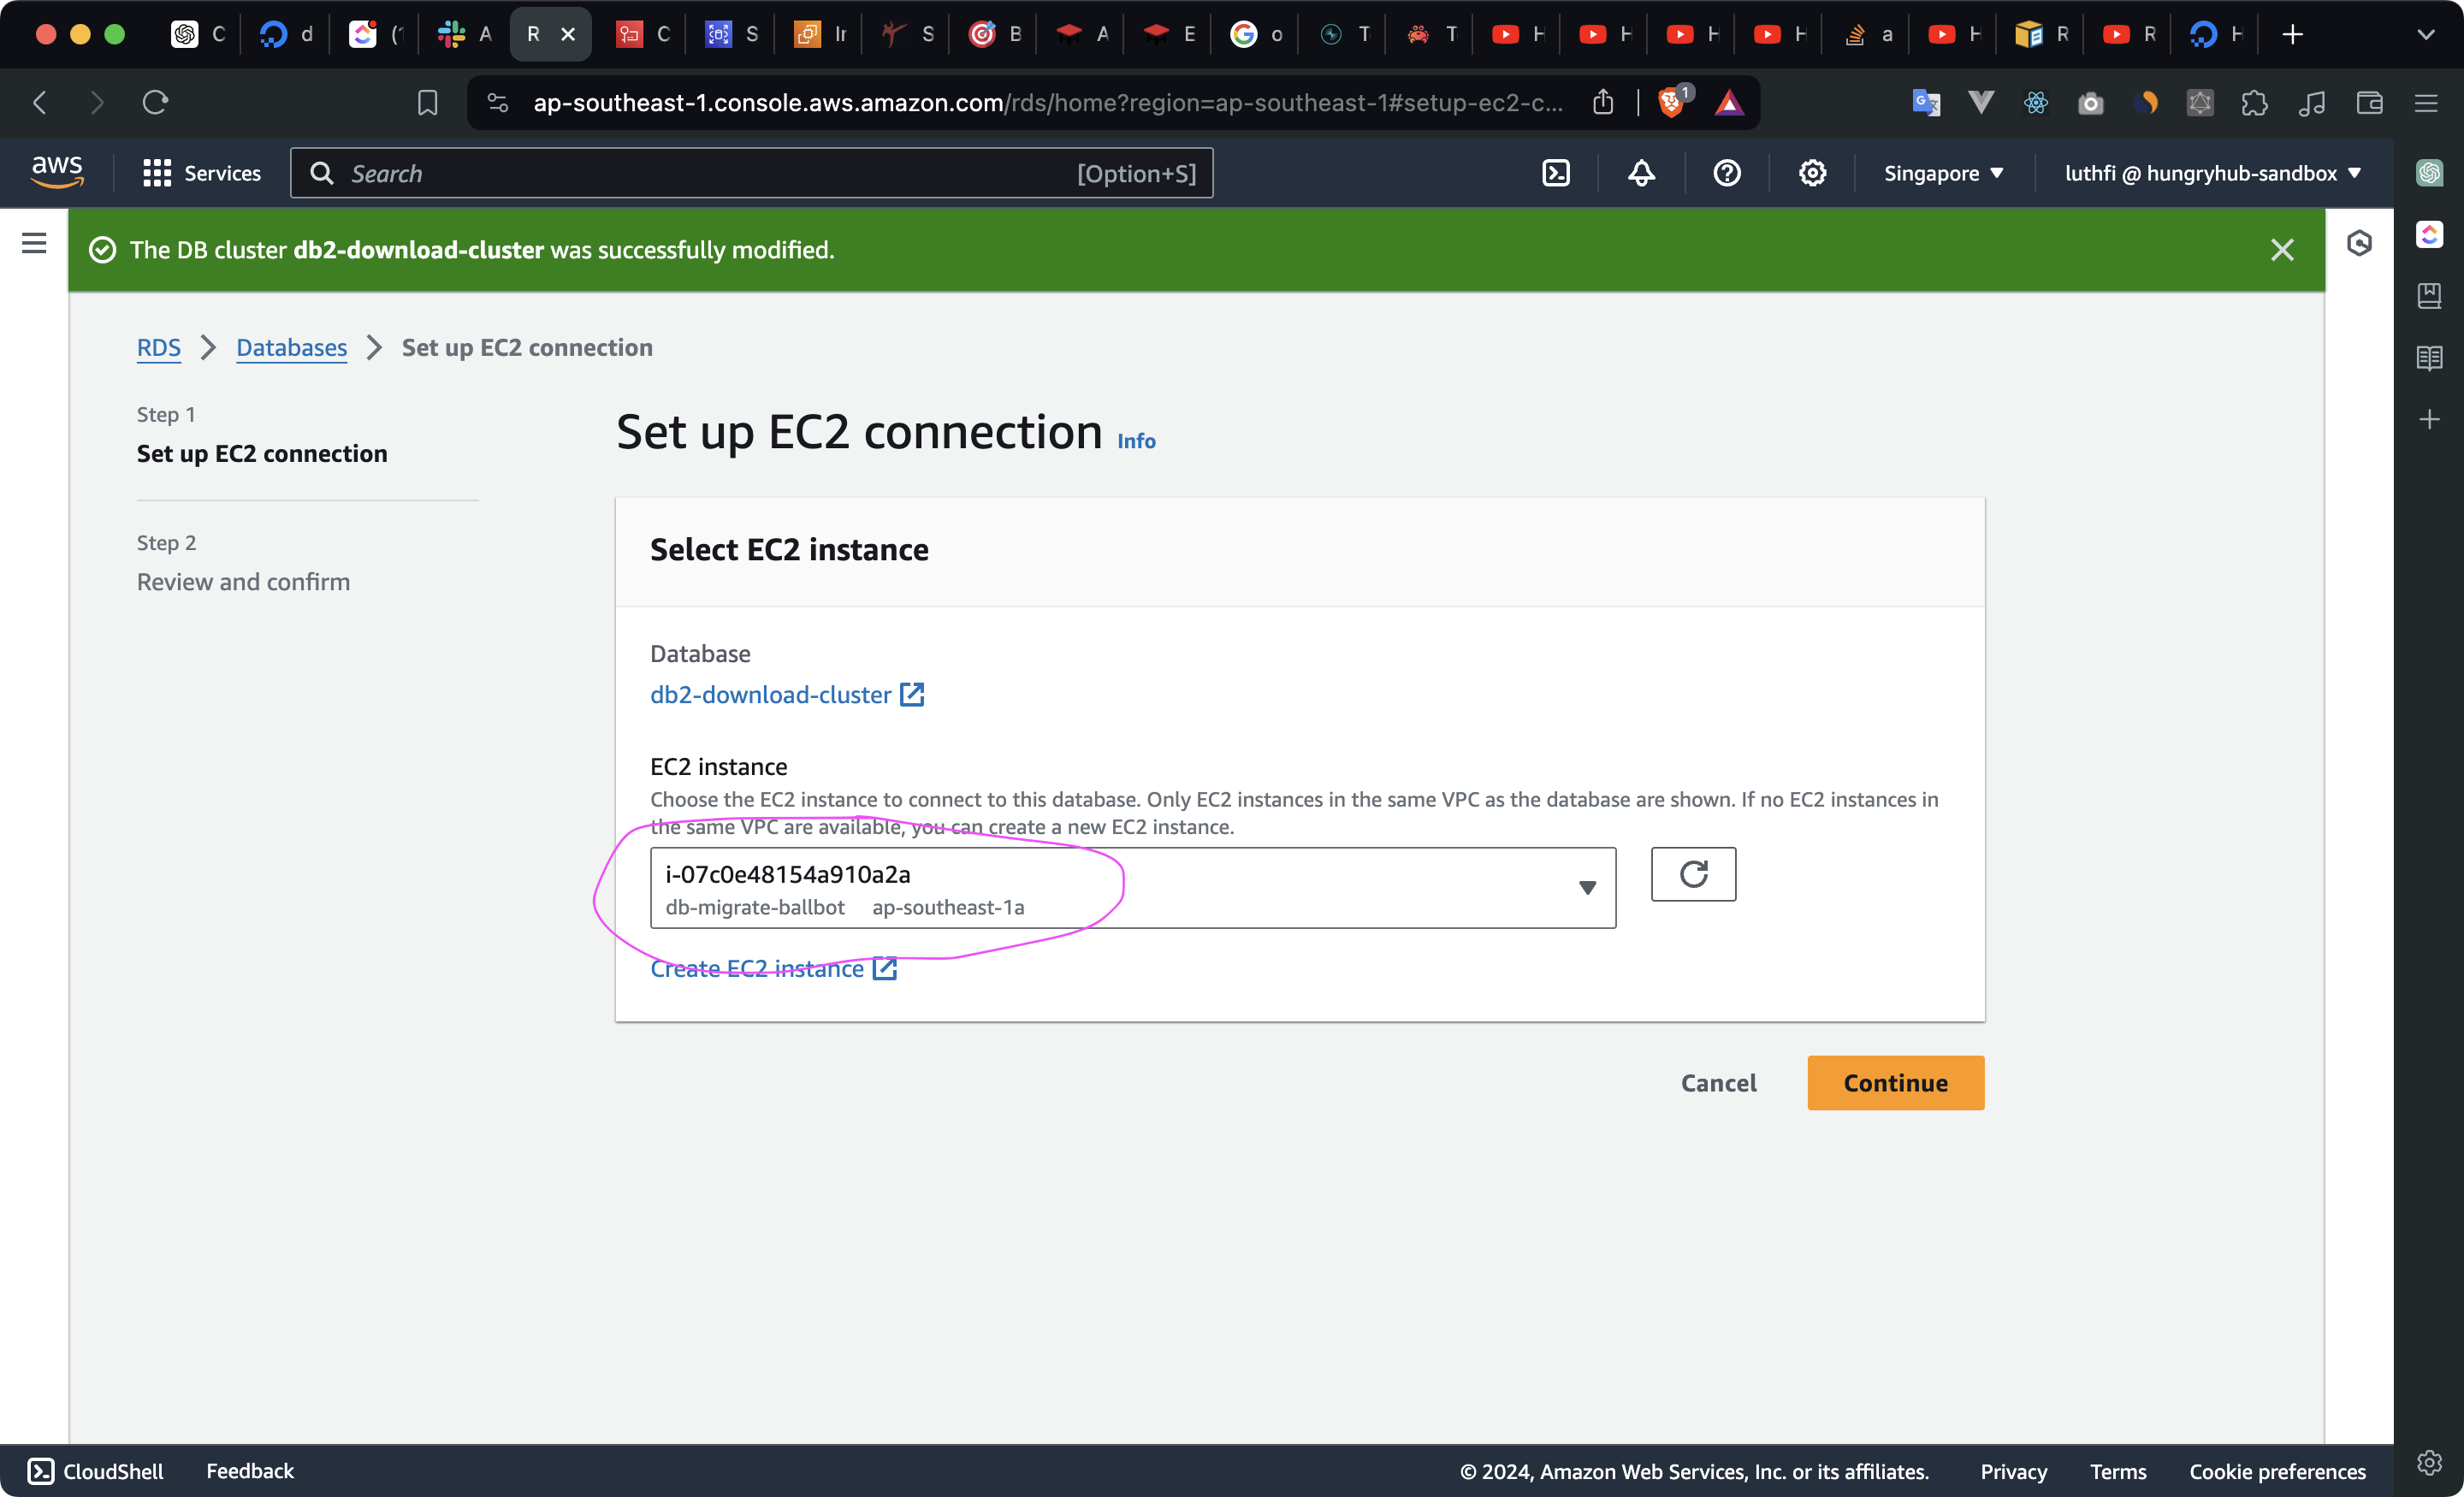
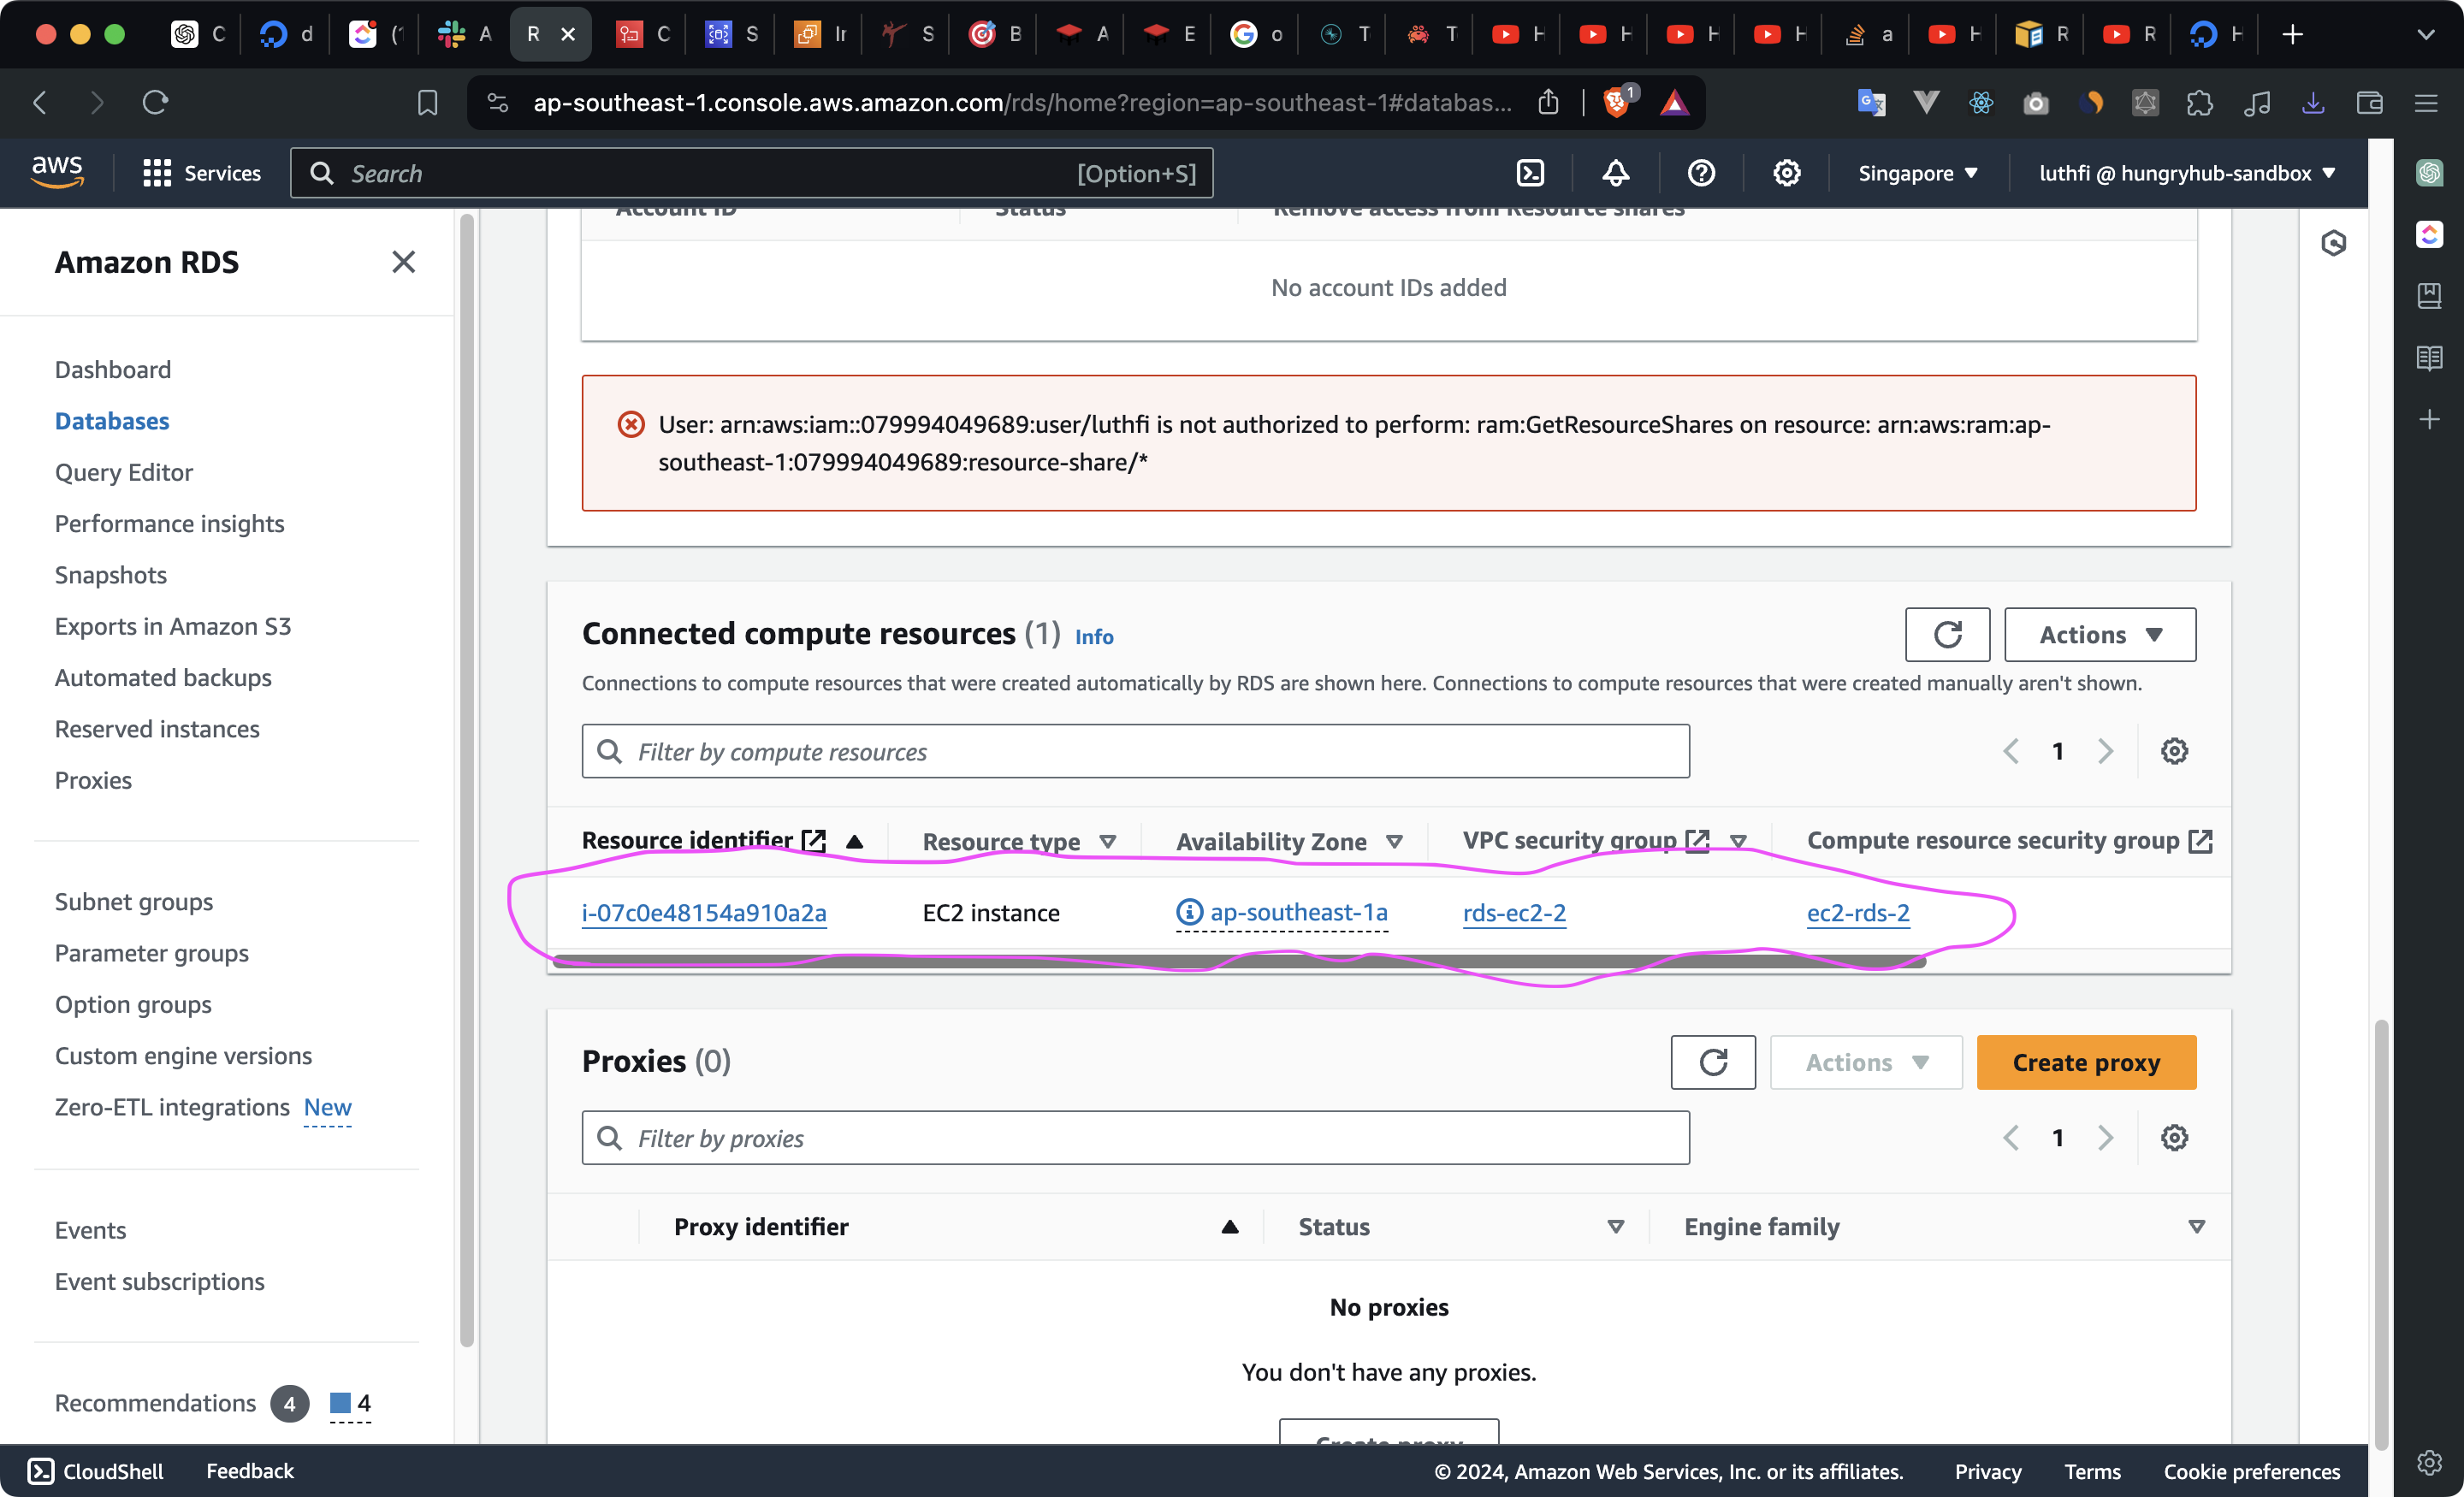
- Follow the steps until finished
- Once the process is complete, you will have the connection details to connect to the RDS instance from the EC2 instance
Step 4: Dump Data From RDS Instance
- Connect to the EC2 instance using SSH
- Install MySQL client
sudo apt update
sudo apt install mysql-client
- Dump the data from the RDS instance
mysqldump -h <rds-endpoint> -u <username> -p --single-transaction --routines --triggers <database-name> | gzip > /path/to/your/local/backup.sql.gz
Example:
mysqldump -h db2-download.c2i8lks3rhzq.ap-southeast-1.rds.amazonaws.com -u root -p'e6duz3zzN8NRmUVGKQOS' --set-gtid-purged=OFF --single-transaction --routines --triggers --quick booking_production | gzip > ~/backup2.sql.gz
- If there are errors related to GTID, you can try to add
--set-gtid-purged=OFFto the command - If there are errors related to table or view you can ignore them using
--ignore-table=<database-name>.<table-name>Example:
mysqldump -h db2-download.c2i8lks3rhzq.ap-southeast-1.rds.amazonaws.com -u root -p'e6duz3zzN8NRmUVGKQOS' --set-gtid-purged=OFF --single-transaction --routines --triggers --quick --ignore-table=booking_production.reservation_pageview_views booking_production | gzip > ~/backup.sql.gz
- Wait for the process to complete
- Once the process is complete, you will have a backup file in the specified path
- Copy the backup file to your local machine
scp -i /path/to/your/key.pem ec2-user@your-ec2-instance-public-dns:/path/to/remote/file /path/to/local/directory
Example:
scp -i "ec2-db-migrate-ballbot-luthfi.pem" ubuntu@ec2-52-221-234-217.ap-southeast-1.compute.amazonaws.com:/home/ubuntu/backup.sql.gz ~/backup.sql.gz
Note: If your internet connection is slow, you can create k8s pod in our staging cluster and download the backup file to the pod.
Step 5: Restore Data To DigitalOcean Managed Database
- Create a new Database in DigitalOcean Managed Database
CREATE DATABASE `hh-production-clone` DEFAULT CHARACTER SET = 'utf8mb4';
- Install pv to monitor the progress of the data import
sudo apt install pv
- Restore the data to the DigitalOcean Managed Database
pv ~/backup.sql.gz | gunzip | mysql -h <do-db-endpoint> -P 25060 -u <username> -p'<password>' <database-name> 1>/dev/null 2>/root/restore_errors.log
Example:
pv ~/backup.sql.gz | gunzip | mysql -h db-mysql-staging-do-user-123-0.b.db.ondigitalocean.com --compress --force -P 25060 -u doadmin -p'xxx' hh-production-clone 1>/dev/null 2>/root/restore_errors.log
- Wait for the process to complete

- Once the process is complete, you will have restored the data to the DigitalOcean Managed Database
- Verify the data in the DigitalOcean Managed Database
- Update the connection details in your application to point to the DigitalOcean Managed Database
- Test the application to ensure that it is working as expected
Step 6: Clean Up
- Terminate the EC2 instance
- Terminate the RDS instance (if you no longer need it)
- Delete the security groups associated with the EC2 and RDS instances
How To Change Database Staging Configuration
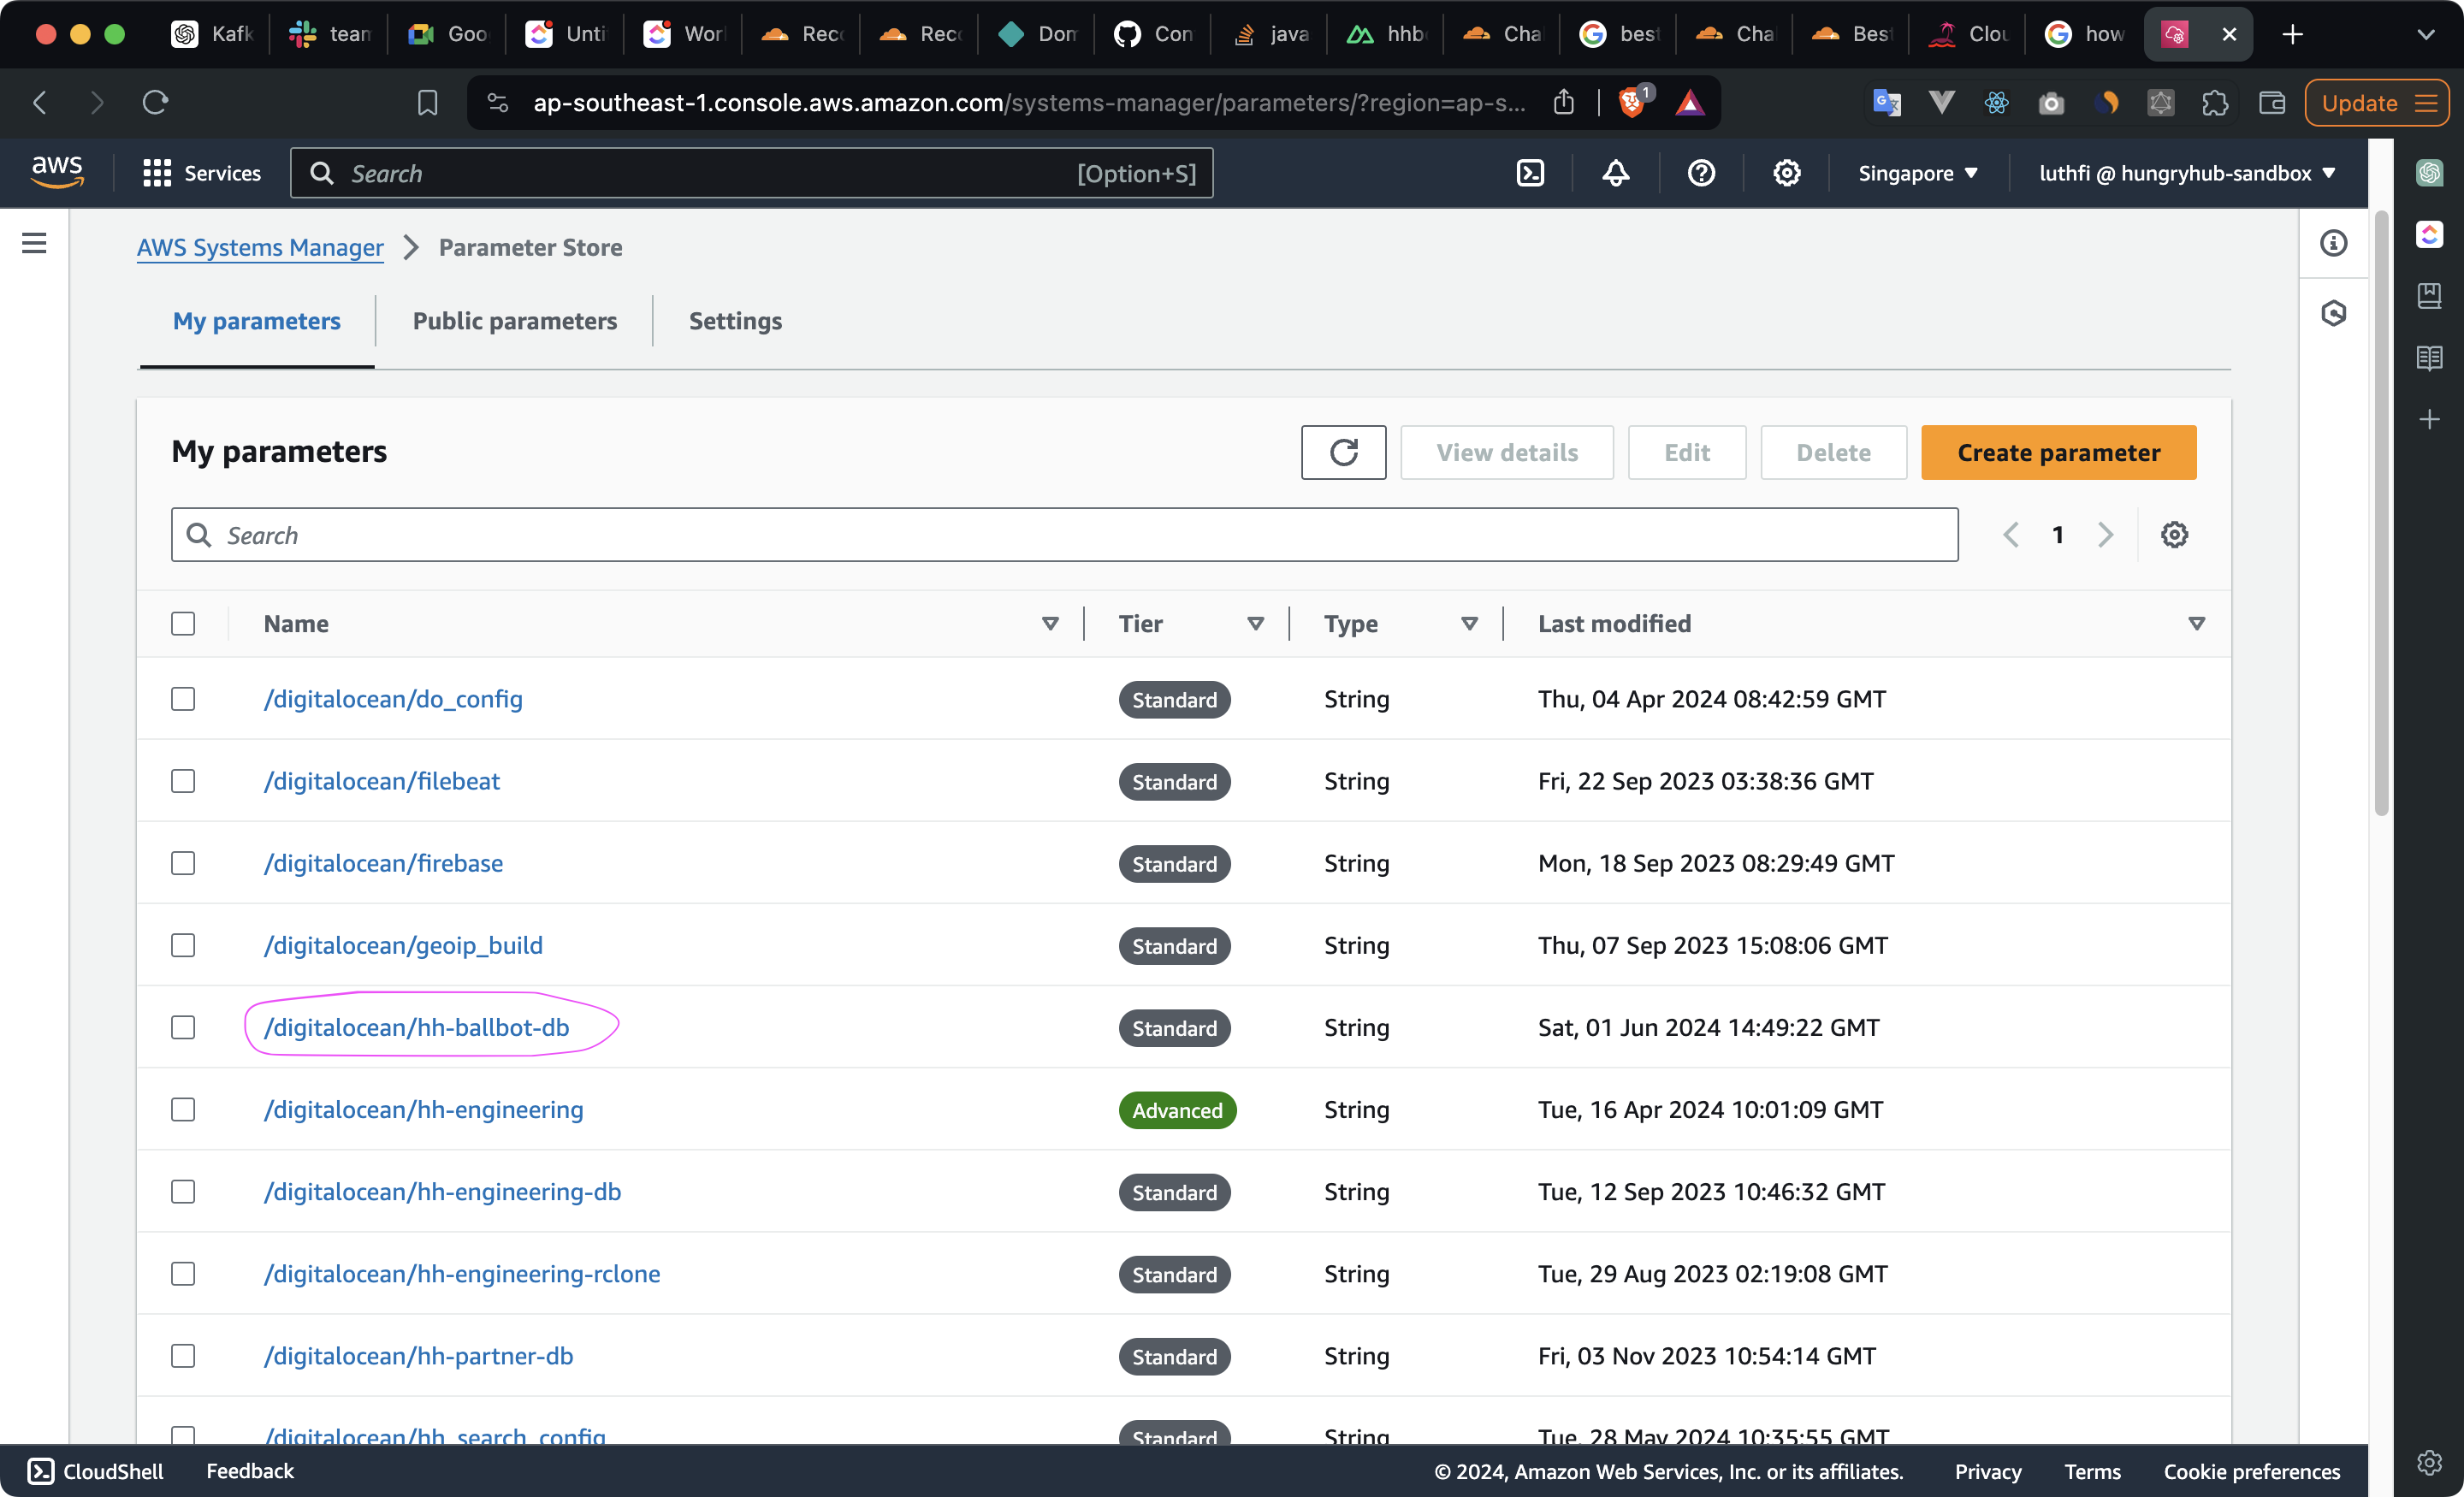
- Go AWS System Manager
- Go to Parameter Store
- Search for
/digitalocean/hh-ballbot-db
- Edit the
production > databasevalue to the new database name
production:
  <<: *default
  database: hh-production-clone
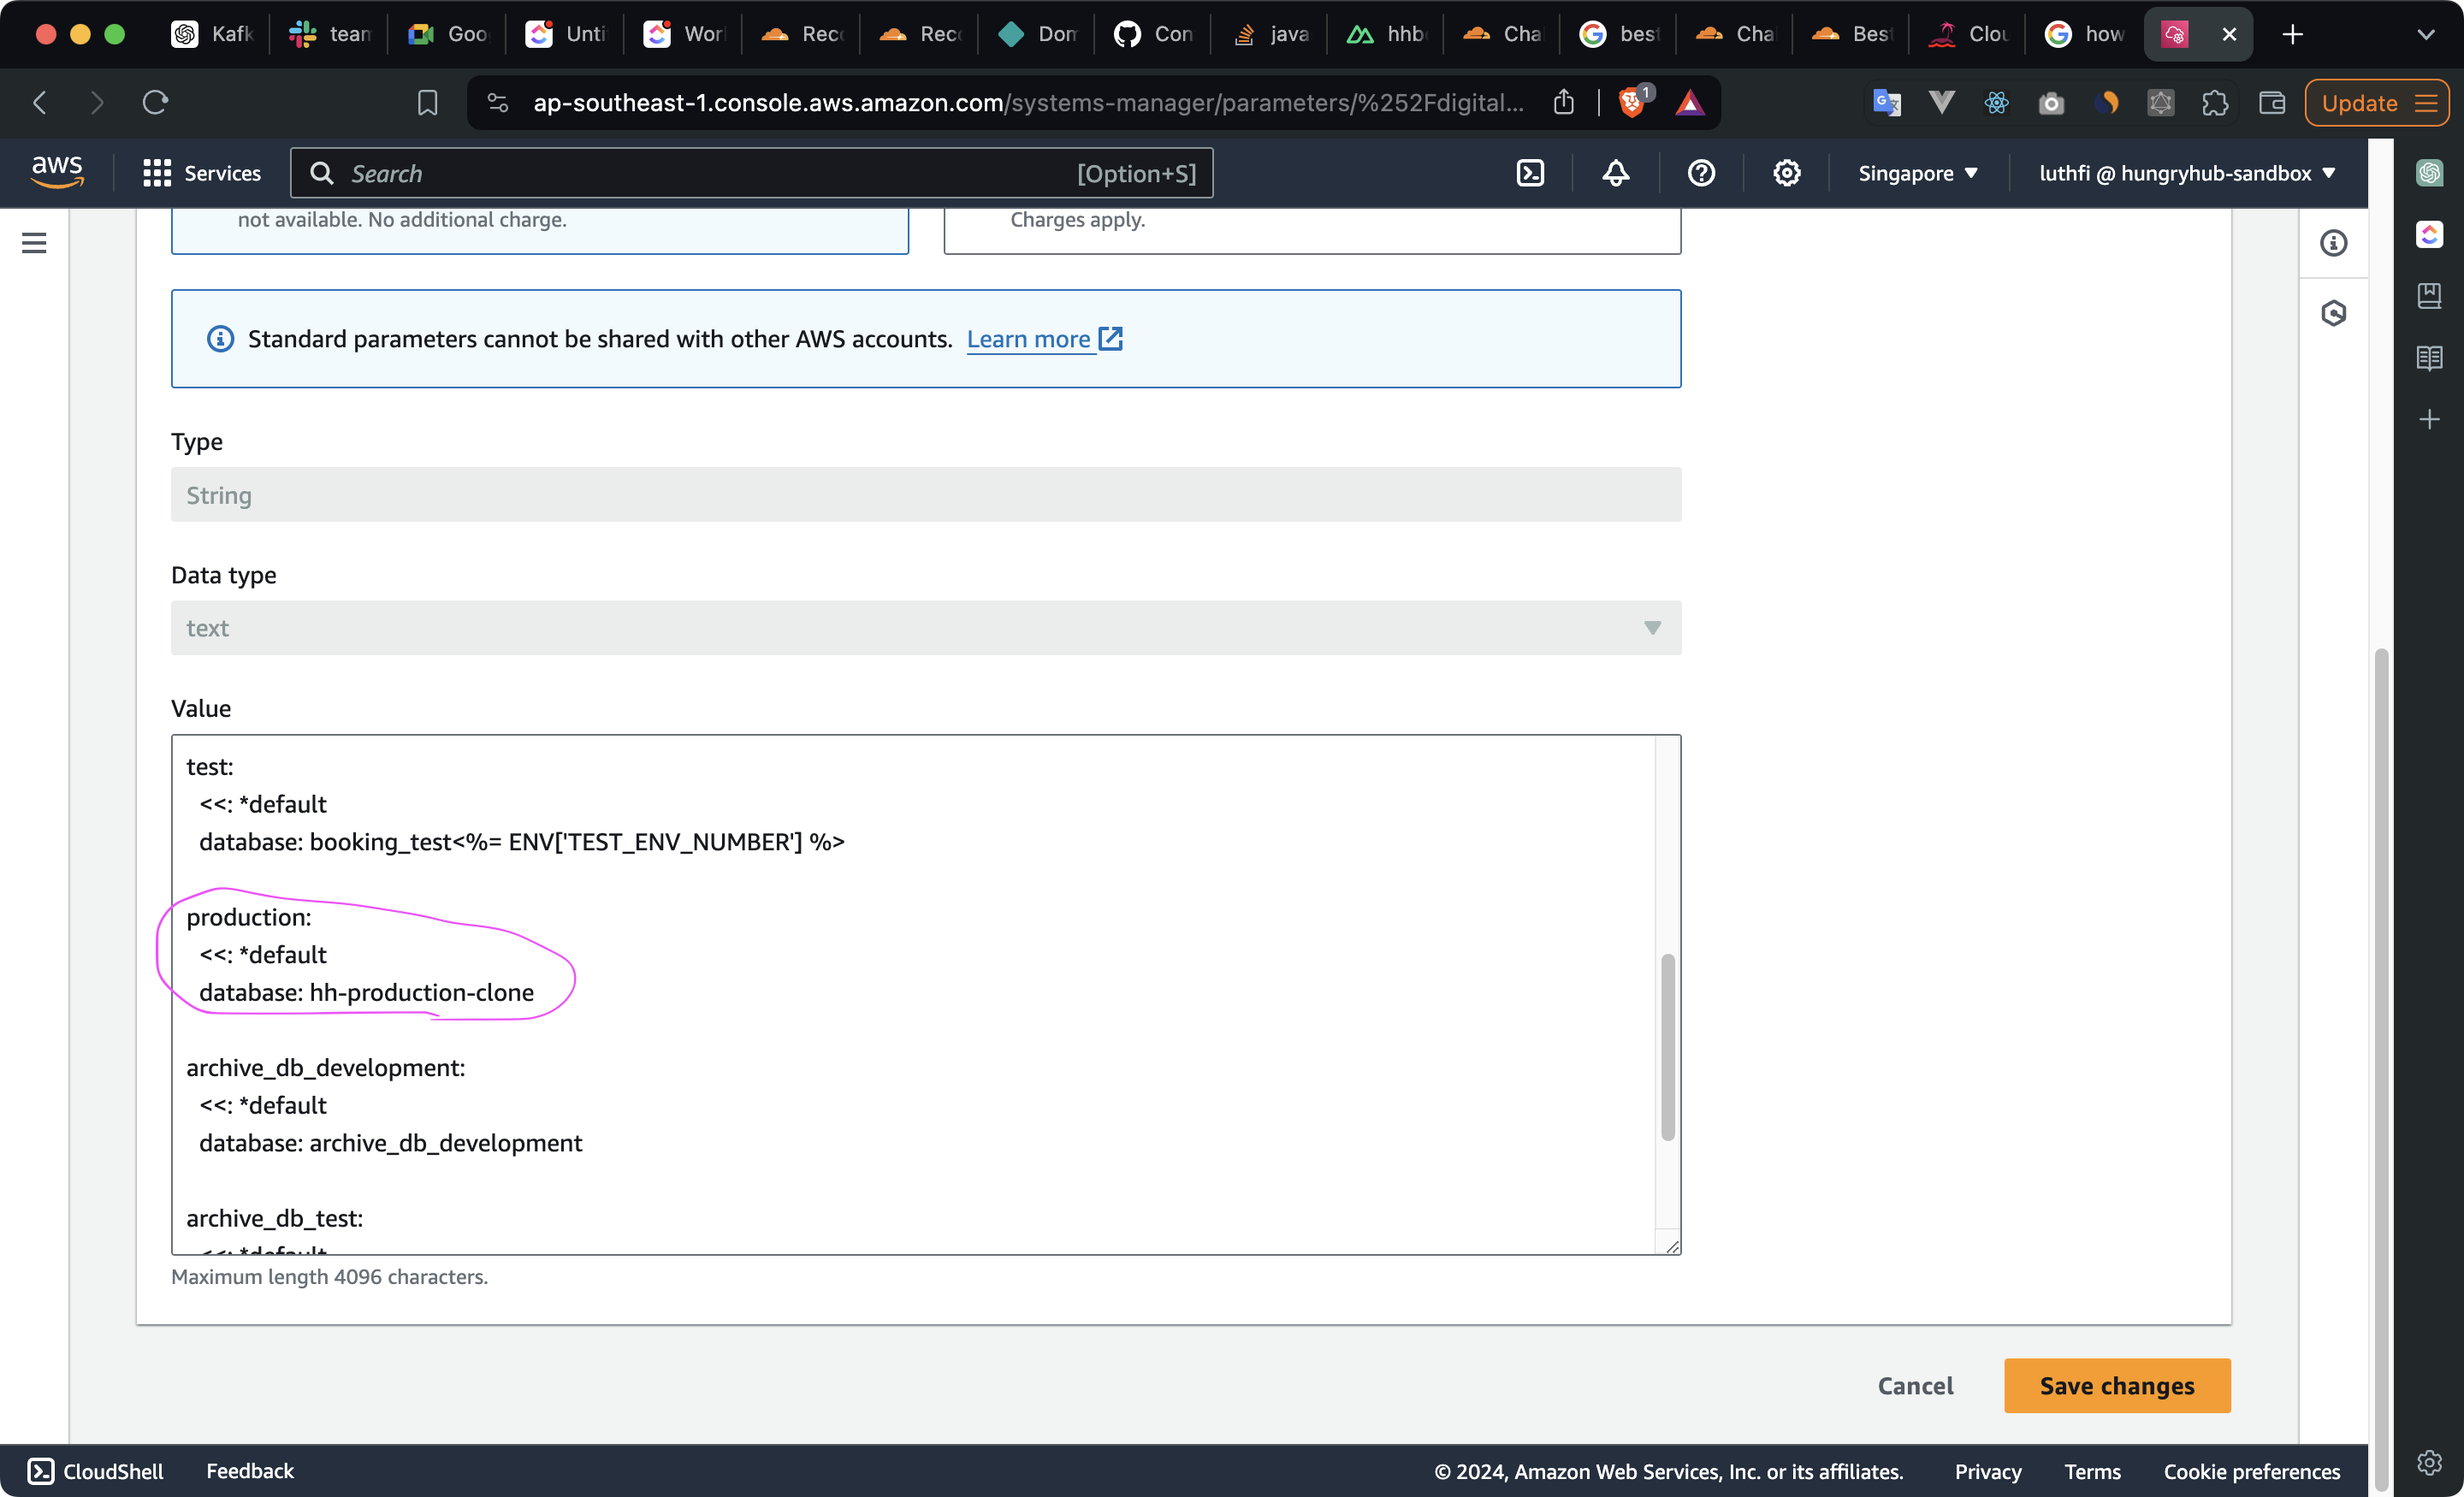
- Save the changes
- Trigger the deployment pipeline to apply the changes